How to Boot a VirtualBox virtual machine from a physical USB Flash Drive
Last update: July 25, 2024
Running an operating system from a USB flash drive within VirtualBox can be very useful for testing and other purposes. This guide will take you through the process step-by-step, to help you boot a VirtualBox VM from your physical USB flash drive.
Step 1: Prepare the USB Flash Drive
Before starting, make sure your USB flash drive is ready to boot. You can use tools like Balena Etcher, Rufus, or Ventoy to create a bootable USB drive. Follow the instructions for your chosen tool to ensure the USB drive is correctly prepared.
Step 2: Locate the VirtualBox Installation Folder
By default, VirtualBox is installed in C:\Program Files\Oracle\VirtualBox. If you have installed
VirtualBox in a different location, you will need to find its installation folder:
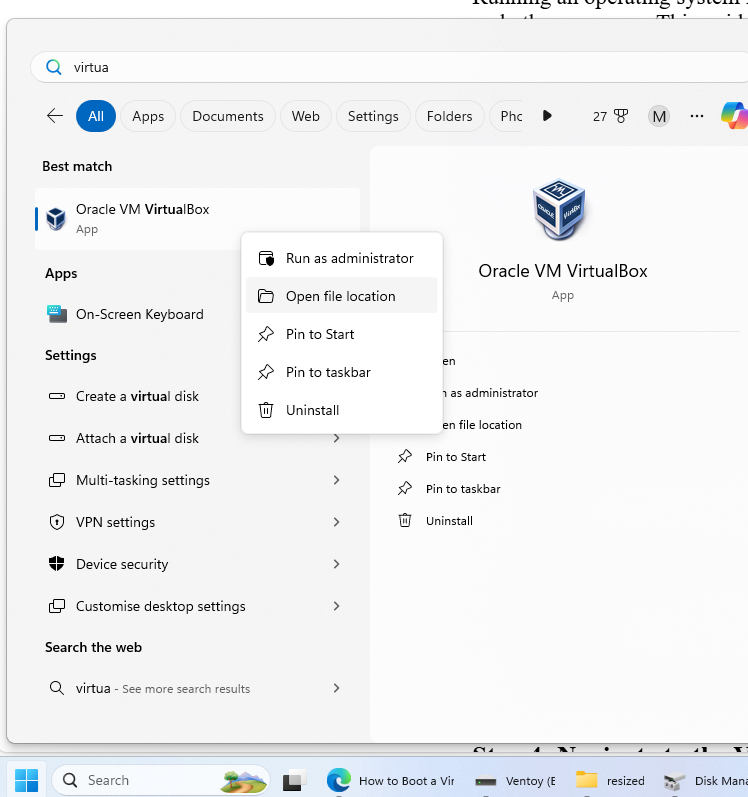
- Search for VirtualBox in the Windows Start menu.
- Right-click on 'VirtualBox' and select 'Open file location'. This will open the folder containing a shortcut to VirtualBox.
- Right-click on the shortcut and select 'Open file location' again to open the actual installation folder.
Step 3: Open Windows Terminal as Administrator
To run commands with the necessary permissions, you need to open the Windows Terminal as an administrator:
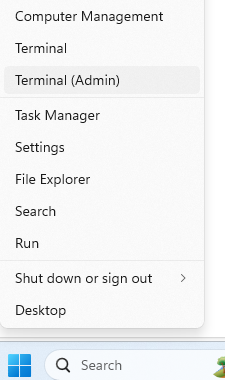
- Right-click on the Windows Start menu.
- Select "Terminal (Admin)".
Step 4: Navigate to the VirtualBox Installation Folder
In the Windows Terminal, navigate to the VirtualBox installation folder. Assuming it is installed in the default location, enter the following command:
cd 'C:\Program Files\Oracle\VirtualBox\'Step 5: Identify the USB Flash Drive
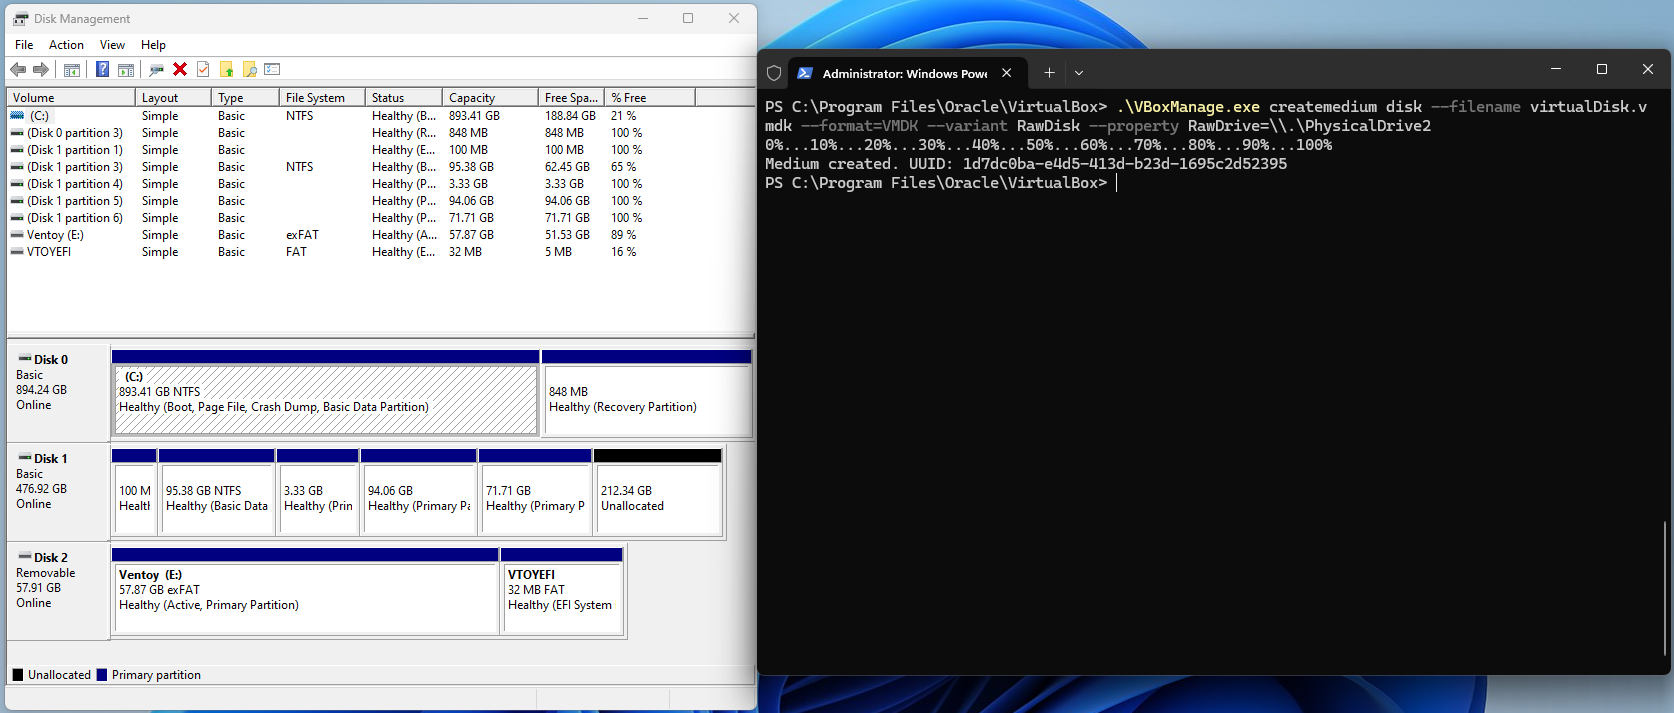
You need to find the ID of the USB flash drive you want to boot from:
-
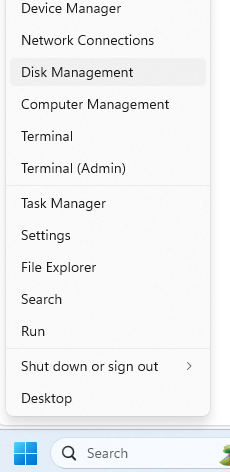
Right-click on the Windows Start menu and select 'Disk Management'.
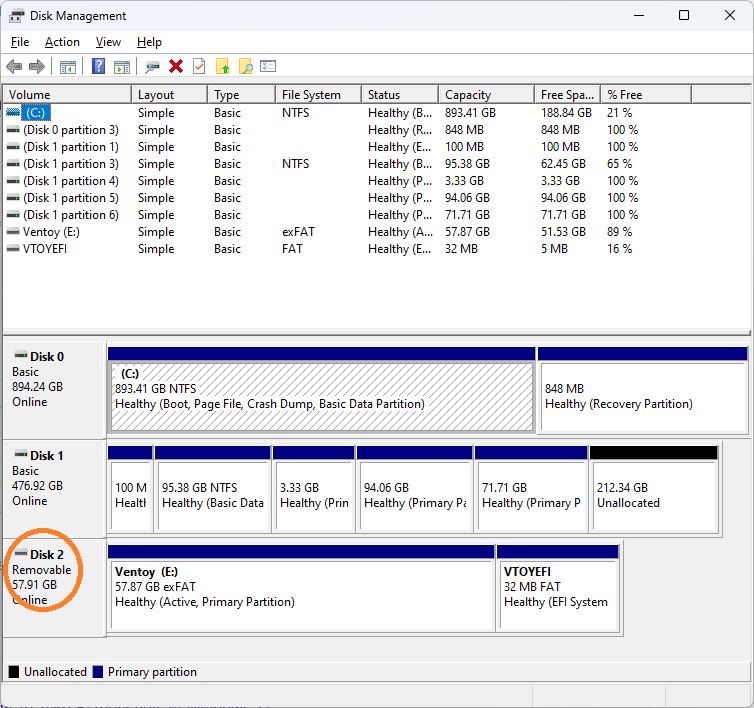
- In Disk Management, locate your USB flash drive in the lower half of the window.
- Note the disk number (e.g., Disk 1 or Disk 2) associated with your USB drive.
Step 6: Create a VMDK Virtual Disk
In the Windows Terminal, create a VMDK virtual disk that links to the physical USB drive. Replace
PhysicalDrive1 with the correct disk number if necessary:
.\VBoxManage.exe createmedium disk --filename virtualDisk.vmdk --format=VMDK --variant RawDisk --property RawDrive=\\.\PhysicalDrive1This command creates a file named virtualDisk.vmdk in the VirtualBox installation folder.
Step 7: Open VirtualBox as Administrator
Next, you need to open VirtualBox with administrative privileges:
- Search for VirtualBox in the Windows Start menu.
- Right-click on VirtualBox and select 'Run as administrator'.

Step 8: Add the Virtual Disk to the VM
- In VirtualBox, select the virtual machine (VM) you want to boot from the USB drive.
- Go to the VM's settings, then navigate to 'Storage'.
-
Under 'Controller: SATA', click the icon to add a hard disk and then click 'Add'.
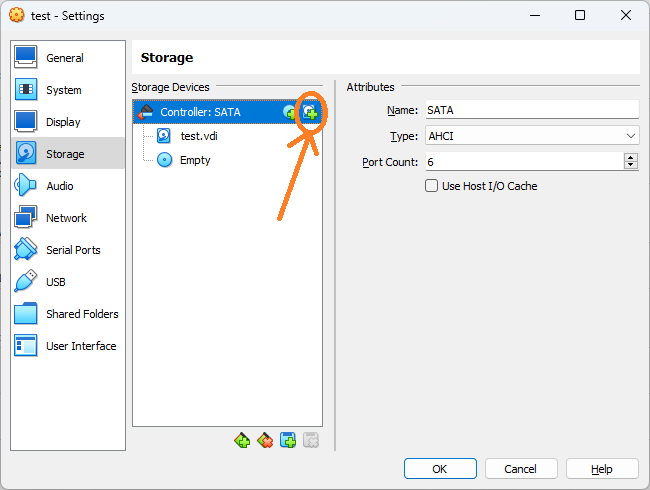
- Navigate to the VirtualBox installation folder and select the
virtualDisk.vmdkfile.
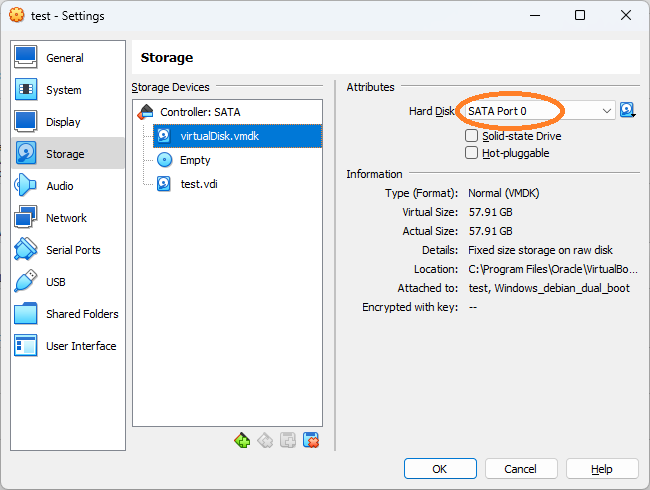
Step 9: Adjust the Disk Order
To ensure the VM boots from the physical USB drive:
- In the disk's attributes, change the port of the added virtual disk to
SATA port 0. - Adjust the ports of the VM’s internal virtual disk and optical drive to higher numbers, making sure the new virtual disk is the first in the boot order.
Step 10: Start the VM
Finally, start the VM. It should now boot from the USB flash drive.
By following these steps, you can successfully configure VirtualBox to boot from a USB flash drive, enabling a wide range of testing and development scenarios.
